Wednesday, October 31, 2012

DIY Halloween Costumes

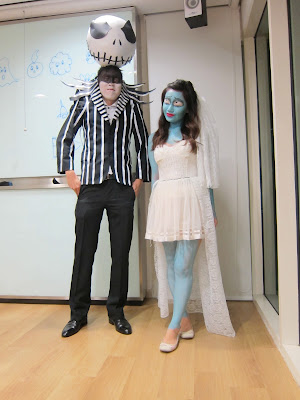
This year we decided to go as Tim Burton's characters. I went as Emily from Corpse Bride and KH went as Jack Skellington from The Nightmare Before Christmas (aka "The Pumpkin King"). My costume was pretty simple to do but KH's was a challenge (as usual).

Jack Skellington The Nightmare Before Christmas Costume

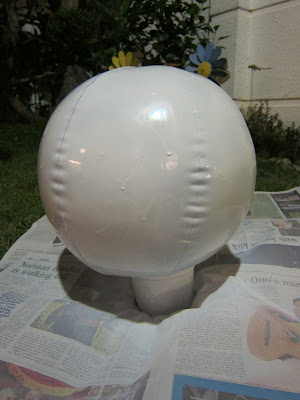
I recommended that he paint his face to look like Jack's but he insisted that it will not do Jack's round head justice. So we went to hunt for something round to mount on top of his head. It had to be big and spherical but also light enough to sit on his head comfortably all night. We settled on a beach ball ($3.90) and spray painted it white ($3.50). Creating Jack's head was the easy part. After the paint dried, we just cut out shapes from a sheet of black paper to make Jack's eyes, nostrils and mouth. Figuring out how to mount Jack's head on top of KH's head was the challenge. Initially, we tried gluing a headband to the base of the beach ball but it didn't really hold up as well as we'd had hoped. In the end, we had to use a lot of masking tape to hold it in place.

*Tip: On hindsight, we probably should have done the spray painting on a less windy night because the ball did topple over a few times causing us to have to do over some parts. Also, we should have gotten a headband with more teeth so it would have held on better to the head.

Spraying painting a ball
beach ball


Next, he had to "pimp" his suit with stripes which was such a pain to do because Jack's suit had so many strips... I think it took him about 2-3 hours. KH used about 2 rolls of white silk ribbons ($1.90/roll), 1 cm in width, to create the pin-stripes on his black blazer. The process involved cutting ribbons to fit the silhouette of the blazer and painstakingly using double-sided tape to hold them down (the double-sided tape came off nicely at the end of the night which was great). After he was done with the blazer, he was too tired to finish his pants but he wore them nonetheless... haha...

*Tip: I would recommend widening the spaces in between the ribbons so that you won't have to do so many pin-stripes.

Emily Corpse Bride Costume 

My costume was relatively simpler. Unlike KH, I didn't really have much construction to do. The only prop I needed was a 2-metre long white laced cloth ($5.50/metre) which I got from Katong Shopping Centre. I used about 1.3 meters of the lace to extend my skirt and make it look like it had a train. The remaining cloth I used as a veil. In order to secure the veil to my hair, I threaded a string through the lace and used bobby pins to hold it down. The most challenging part of the costume was the full body and face painting. Thankfully, I had Promise Phan's makeup tutorial to reference HERE. It took me about an hour to do it (paint drying time included). I used 1 tube of white and 1/10 tube of blue paint ($3.50/tube).

*Tip: I am not sure why but after my paint dried, the blue looked darker than it initially was when I first mixed it. Hence, I ended up looking a bit too blue and maybe too much like a smurf? I would recommend testing it on your hands first to see what shade your paint will look like after it dries.
.
.
.
.
.
.

Now Let's compare the before and after shots to see if we did Tim Burton's characters justice? 

costumes


I think we did pretty ok for a first attempt? 

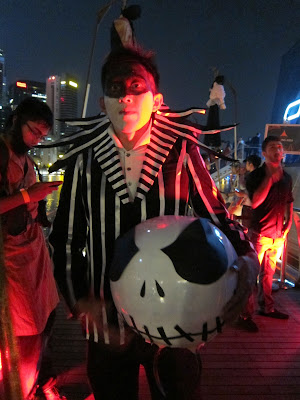
We headed down to Avalon at Marin Bay Sands to meet our friends. It was our frist time there and the club had a great 360-view overlooking Marina Bay :) Everyone was decked out in their Halloween gear... well almost everyone (except Jacky the "Baby Slayer")... haha... Cassandra kidnapped some demon babies dolls from Zouk and Jacky tried to pass them off as his costume. Anyways, enough said... here are some shots from the night... 

Egyptian Queen Cassandra :) 


Jack Skellington costume


Jacky the Baby Slayer (Left)

despicable me minion
My favorite costume!!!


White boyz
Best dressed won a trip to LA (Right)

Bane Vs Batman


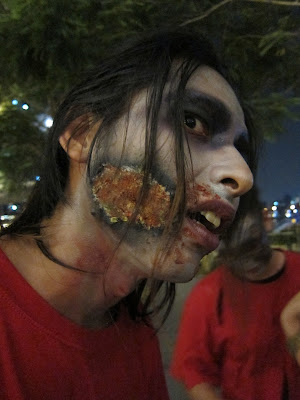
 zombi costume

avalon nightclub
Over looking Marina Bay

Avalon surrounded by water

Tuesday, October 30, 2012

Review of Marble Slab Creamery Ice-Cream


Red velvet flavored cupcakes are the reason I fell in love with cupcakes in the first place! Ever wonder what's inside those lovely red slices of heaven? I decided to do some research (maybe will even attempt to bake some one day when I am having one of those "Nigella Lawson" days) and found the following... 

Red velvet cupcakes ingredients

1. Cocoa powder (unexpected!) 
2. Red food dye 
3. Buttermilk - It's responsible for making the cake moist & flake into soft crumbs as you bite into it. 
4. Lovely swirls of Cream Cheese frosting 

If you love the cupcake version of red velvet then chances are you would like the ice-cream version too right? Not quite. I've tried Ben & Jerry's take on red velvet and I can't say it does its cupcake cousin justice. It was too sweet and lacked any distinct taste of cream cheese or cocoa powder :( but fret not my fellow red velvet cupcake lovers! I think I have finally found a brand that makes a decent red velvet flavored ice-cream! Check out Marble Slab Creamery. Their concept is similar to Cold Rock's, although I  never did care much for the "mix-your ice-cream-with-overpriced-toppings-to-form-your-own-unique-flavor" idea.

In my opinion, Marble Slab Creamery is the first ice-cream maker to have nailed the red velvet flavor (although it's terribly expensive at $10.50/cup with 1 topping)! Another flavor that I liked was called Yuzu, which is a citrus fruit usually used in Japanese cuisine. Their Yuzu ice-cream tasted light & refreshing like a sobert that was laced with a milky but not too creamy base (think midway between a dairy based ice-cream and a sobert).

ice-cream

ice-cream toppings

ice-cream waffle bowl
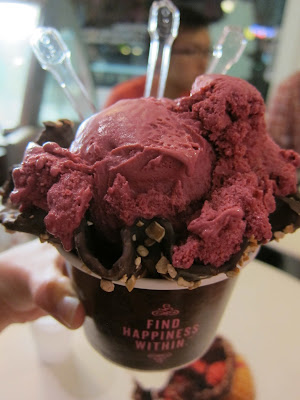
Love their tag line "Find Happiness Within" :)

red velvet ice-cream
Notice how dark their Red Velvet is compared to B&J's light pink one? 

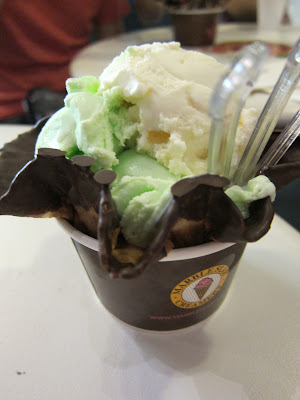
ice-cream
ice-cream
Yuzu (the light yellow scoop)


Another reason to love Marble Slab is their wonderful Graham crackers, which you can mix into your ice-cream as a topping. It's rare to see Graham crackers in Singapore since we don't have the tradition of making smores, which I love. As a result, I usually make my smores with digestive biscuits. If you're feeling really lazy, you could get those digestive biscuits that come already coated with chocolate and toss a marshmallow on it before micro-waving it (this method negates the need for a fireplace and spreading your own Nutella on it. Lazy people's guide to life). 

ice-cream with graham crackers

PS: The scooper at the counter, a bubbly girl by the name of Alice, told me that she decided to work for Marbleslab Creamy because she got hooked on their red velvet ice-cream and couldn't bear to be too far away from them :)

Reviewed by Amanda Lim on

Rating:3.5

Address : 6 Eu Tong Sen Street #01-27, The Central, Singapore 059817
Phone: 6224 4278 / 6224 4248


Sunday, October 14, 2012

Easy Homemade Halloween Costumes Ideas


It's October! Almost time for one of my favorite holidays - Halloween

At this time, many of you are probably scrambling to find cool parties to attend and are racking your heads over what to dress up as this year. I found some of the best costume ideas HERE (on Quora) and I also had some pre-Halloween practice as I attended a theme party at the "N-House" (a student dormitory for entrepreneurial students of the NUS Overseas Colleges program) so I figured why not share some ideas here. Yes, I know... I've graduated but a bunch of my friends still have not so I still get to enjoy the occasional perks of crashing student events (at least till I look too old to pass for an undergraduate but by then I sure hope all my friends have graduated). The theme of the party was to dress up as any character that started with an "N" (yes,  that doesn't sound very original... but kudos to the organizing committee! I think it was the first time the residential assistants (RAs) of the N-House are throwing a theme party. Usually, it's just the regular pizza & beer gatherings.)


We went through a few iterations of what to go as...
1. Nutella (... too good to waste on any part of the body other your stomach)
2. Newton (...this costume was the easiest! it only required one to glue an apple to his head &  if you didn't mind it shaving off the rest of your hair after the party.)
3. Naked Man (...this might be illegal on the university's campus)
.
.
.
And the list went on till we settled on going as the Nyan Cat and the Ninja turtle!!! The former is a character from a viral video on YouTube and the latter was just a classic cartoon hero back in our days, when were were kids. Best of all, both of them had their own theme songs that we could sing and annoy our friends. #legit!!! 

Anyways, just wanted to share how we created our own costumes in case anyone is thinking of going as these characters this Halloween. I think we spent less than SGD$20 on BOTH costumes which was much less compared to what we spent on Bay to Breakers in 2011 (We bought our costumes for ~USD$40+++ per piece. We went as a Roman soldier and an Egyptian Princess). Actually, making a costume is much more fun than buying one! I would definitely recommend it as it forces you to be scrappy and stretch your creativity (not your wallet). Moreover,  it's just a great excuse to stay up late with your best bud & hack up outfits together (some might even call this "team bonding" haha...)

How make a Ninja Turtle costume 

Things you'll need...

1. Create a Shell
- Took us ~2 hours to create the whole shell! It involved some origami skill A) Folding the Hexgons as per the instructions below, then we folded the top and bottom slides of the Hexgon inwards to make the it a little smaller and rectangular looking, B) Stuffing the shell (aka the aluminum baking tray purchased from NTUC supermarket) with tissue rolls to give it a convex shape before wrapping it once over with brown paper and sticking out folded Hexgons on top.


2. Draw on some yellow abs
- Much less painful than working out

3. Buy some weapons
- Make sure that they are age appropriate :)


4. Keep your real identity a secret!


How to make a Nyan cat costume

*My interpretation of the Nyan cat was pretty simple. Click HERE for a more elaborate take on the beloved internet meme :)

1. Get a rainbow!
- I got my rainbow tutu from Amazon (Inspired by Cassandra. Bought by KH. - Thanks guys!)

2. Buy a set of car ears & a tail

4. Cut some pink squares and stick them on your body (I used double sided tape)

3. Grow some whiskers! (or get a turtle to draw 'em on)


Now you are all ready to P-A-R-T-Y!!! (some pictures from that night... before my camera batt died)


Happy Halloween guys & if you have any suggestion/ideas for what we should dress up as for Halloween let me know :)

PS: Anyways, I was bored so I looked up ... The origins of Halloween ... which apparently came from the ancient Celts about 2000 years ago. They lived in the area we know now as Ireland and celebrate their New Year on November 1. Hence, 31 October was like a New Year count down for them (sorta) till superstition took over and some of them believed that the time in between the old and new year blurred the lines between the dead and the living (seriously, where do people come up with these stuff? I suspect it probably came from disgruntled parents who wanted to keep their kids at home & out of trouble on New Year's eve?)

Friday, October 5, 2012

Review of Nook House of Pancakes


I saw a Facebook ad for Nook House of Pancakes and clicked on it. I am glad I did because I ended up dragging my friends there for brunch one weekend morning and I really enjoyed it. It was a novel experience, being able to design, and dare I say, cook my own pancakes. I wish I could say it brought back happy childhood memories of making pancakes with my mum but in truth, we probably shared more experiences eating McDonalds pancakes together rather than making our own. So Nook, for me, was a chance to create all those childhood experiences you are expected to have. 

Anyways, on to the food...


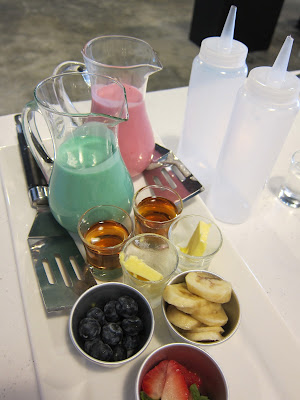
pancake batter


The pancakes come in 6 different flavors, original buttermilk, chocolate, banana, strawberry, blueberry (new! not yet  *officially* on the menu) and pandan (for those who crave a little local flavor to spice up your ang-moh breakfast). You also get to choose 3 different toppings (a mixture of fruits, cream cheese and sweet treats) to go with your pancakes. On top of that, if you still have room for extras, you can always add sides which are the usual breakfast suspects of bacon, mushrooms, tomatoes etc. 


bacon and eggs


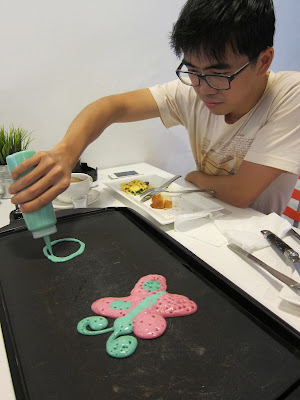
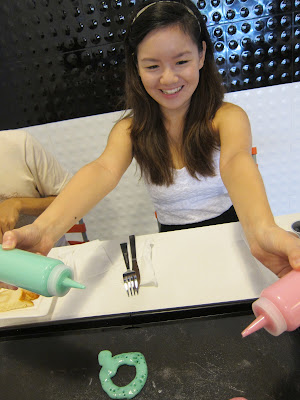
I shared my meal with KH since the pancake servings were for 2 ($25-28) although I sort of wish they came in portions for 1 so that I didn't have to beg/force someone to have pancakes for breakfast too. KH has always prefered his mains savory rather than sweet but he was "sweet" enough to consent to share the pancake set with me. The fact that they did offer an option of savory sides, BACON & EGGS ($5)!!!, did help sway him to my pancakes cause. They were very generous with their serving of BACON & EGGS and much to my delight it kept KH occupied while I unleashed my creativity on the pan armed with two colored bottles of pancake batter. I made butterflies, stars, flowers, hearts ... everything a six-year-old arts-and-crafts student would have drawn, I did with pancake batter. 


making pancakesmaking pancakes        


The pancakes actually tasted pretty good, not too oily which I like. I couldn't really taste the strawberry or blueberry flavor in the pancakes but they had a tint of sweetness to them. Also, I like the fact that you can experiment with how long you want to cook your pancakes for or how thick you prefer them to be. Going through this process made me realized that I like my pancakes slightly thinner so they would be a little crispy on the outside. Cooking your own pancakes, you'd definitely get to try a wide variety of different texture pancakes (made from the same batter no less). 

pink pancake

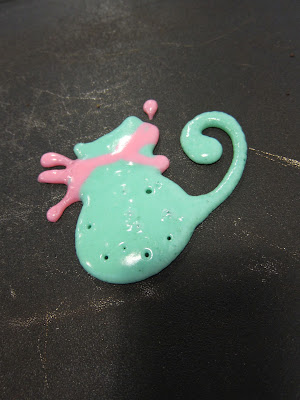
cat shaped pancake

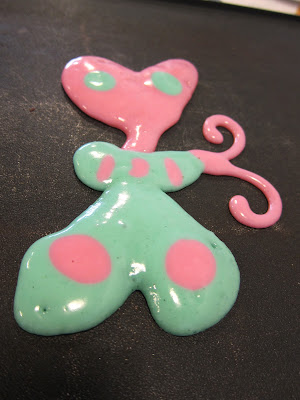
butterfly shaped pancake

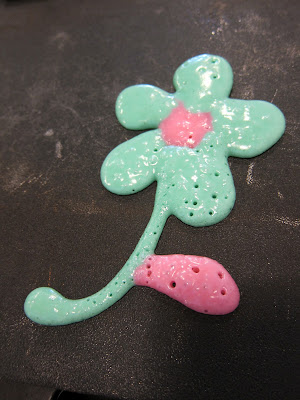
flower shaped pancake


I highly recommend disrupting your usual weekend McDonalds breakfast to try Nook! 

Fun Fact: We spent a while chatting to the boss, Dawn Lim, and learnt that she was an ex-air stewardess before she started this pancake joint. What inspired the name Nook was her travels overseas where families would gather around small breakfast nooks (or make-shift kitchen tables at a corner of a room) to have a cosy meal together before starting the day.

Reviewed by Amanda Lim on .

Rating:4

Address: Bukit Timah , 21 Lorong kilat #01-03 Singapore
Phone: 6466 1811
Website: HERE